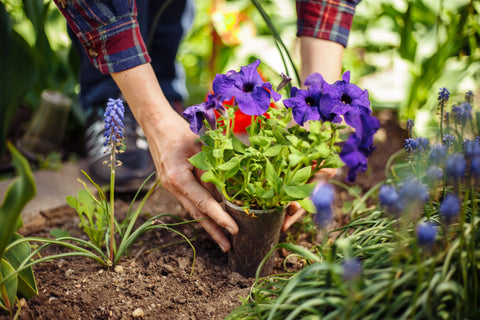
We need to make serious changes in how we live our daily lives, changing how we get our food, cook, and eat. Whatever happens, we must cook and eat more flexibly. We can no longer depend on the things we're used to having around when we want them. By growing some of our food one way, we can start managing the uncertainty if only with a small measure of self-sufficiency. If you have the time and energy to start, now's the time to give it a go.

Direct Sow VS Transplants

You can sow vegetable seeds directly into your garden or grow them as transplants. The decision about which method to use will depend on the type of plant you have, your climate, the size and conditions of your garden, your budget, and the time and effort you are willing to devote to the project.

Direct Sowing

When you directly sow seeds, you just scatter them directly into your outdoor garden soil. If you have a warm between USDA Zones seven or eight and 13 it's possible to direct sow pretty much anything, given that you can wait until it's warm enough to start your garden. If you live in a cool place between USDA zones two some vegetables simply cannot be directly sown, like tomatoes, peppers, and onions. 

You can check the new USDA Hardiness zone map before planting.  They require a longer season of warm weather, so you will be forced to grow them from transplants. It is inefficient, less productive, and riskier for growth. For example, fewer seeds will germinate or be more vulnerable to pests and poor weather conditions as it takes much time for those that germinate to take action.

Transplanting

You transplant, not directly from seed, but you can plant seedlings in your garden soil after having started weeks prior indoors. You can buy transplants, or start them indoors from seed yourself. Many people prefer to sow some plants directly in place-though most anything can be successfully grown indoors first as a transplant if done right, including root crops like beets, radishes, and turnips. 

The main exception is vegetables with long taproots like carrots and parsnips, which have to be directly sown. Unless you buy your transplants, transplanting is way more inconvenient than direct sowing. You have more steps to follow, and a much longer period when you need to care for seedlings. 

Direct sowing is highly recommended and you can and then mix in a few transplants (like those tomatoes you buy or start yourself.) Growing your transplants from seed is among the most rewarding parts of gardening, seriously expanding the possibility for productivity in your garden.

Tip 1: Sowing Seeds in the Best Possible Growing Location

To get off to a great start, you must reserve the very best possible growing location indoors for your tiny young plants. This is where your seedlings will go to be nurtured before moving out into direct sunlight. You should place it near a window where sunlight is abundant, or you can use artificial lighting. Ensure that the area has a good flow of ventilation; most seedlings do best in temperatures of 65-75 F or 18-24 C.

Tip 2: Know the Specific Sun & Temperature Needs of Your Seeds

Seedlings need sun to thrive and you need to know how much the seedling you are planting requires. Position the trays by a window south-facing to give at least six hours of direct sun every day. If you can't get direct sunlight to your seedlings, use artificial light, such as fluorescent or LED grow lights for Indoor Plant Lighting, spaced a few inches above the seedlings. Also, maintain the temperature at a suitable degree. A heat mat can be pretty helpful in keeping the soil warm for fast germination. This would depend on the choice of your plant because it would need a heat mat to sprout the seeds properly and efficiently.

Tip 3: Adequate Water Is The Success Secret

Water consistently but do not overwater it since this can cause damping-off disease. Water from the bottom of the soil carefully; do not disturb the soil. Where seeds are fragile and small, water has to come from the bottom by placing seed trays in a shallow tray holding water. This method allows the roots to be watered without exposing the delicate seedlings to damage.  How often & how much you should water houseplants is important before you plant your seeds.

Tip 4: Feed Them Well

At this point, your seedlings have formed their true leaves. This is the third and fourth leaf of your plant at this point. Now is the appropriate time to feed your plants some nutrition. Fertilize your houseplant with a balanced liquid fertilizer diluted to the recommended strength by the manufacturer's recommendation. This supplemental feeding will help your young, immature plants grow strong and healthy.

Finally, you should provide gentle air circulation to stimulate them to develop sturdy stems. Brush your hand over the seedlings several times a day, or use a small fan to recreate the gentle breezes that occur outdoors.

Tip 5: Gradual Hardening Off Seedlings Outdoors

Once your seedlings have attained two sets of leaves and the threat of frost has passed, now it is time to harden them off and then take them outdoors. Start acclimating the seedlings to the outdoor environment by putting them outdoors for one to three hours each day and increasing the time over a week or two.

How to Buy Plants From Eureka Farms?

You are now licensed for a full-scale nursery with an extensive inventory of landscaping trees, fruit trees, palm trees, and the largest houseplant collection. If you want to enhance your curb appeal or turn your porch into a class act, Eureka Farms can guide you on how to do it all, from topiary trees and hedges to everything in between. You can rest assured that we will handle the shipment with the utmost care across the country so that when your plants reach you, they will be as fresh as new. These indoor plants require less upkeep, improve home air cleanliness, brighten moods, and provide essential touches of the natural world to the work-from-home office. Happy Planting!